If you’ve just recently qualified as an eyelash extension artist – congratulations! This is such an exciting time, and you’ll, of course, want to make sure that you’re providing your first few clients with the best treatment possible. The truth is, though, that we all make mistakes, especially when we’re beginners at something and in reality, honing our craft comes with practice.
Luckily, there are thousands of experienced lash artists out there who had come before you and made the mistakes in their early careers that they’ve had to learn from. Now, you can learn from their errors and hopefully prevent them from happening to you. That’s why we’ve put together this list of eyelash extension tips, so you can get ahead of the curve when it comes to making mistakes whilst working on your clients. These ten eyelash extensions tips for beginners cover the most common mistakes that new lash artist can make, so you can address them before they become a habit!
1. Don’t spend too much time isolating the perfect lash
We know you’re a perfectionist, so you might find that you spend a lot of time finding the ‘perfect’ eyelash to attach your next extension to. We’re here to remind you that every lash will need an extension applied, so really you’re only wasting your time! The longer you take to complete the full set of lashes, the greater the chance you’ll become tired, and your concentration might slip, so it’s within the best interests of both you and your client to keep the process moving.
Lash artist pro tip: Start working with the baby lashes first and move your way up to the longer lashes. The shorter lashes are fiddlier to work with, so it will naturally take longer to isolate the lash and attach the extension. Then you’ll be left with the easier lashes to work with, towards the end of the appointment – which is much better if you find yourself getting tired.
2. Place eyepatches correctly
Yes, they can be tricky to get into place the first time, but once you’ve taken the time to master the art of safely placing eyepatches onto your clients, it’ll become second nature. If you’ve ever made the mistake of placing eyepatches too closely to the eyes, you’ll know that it can cause irritation and, at worse, bruising. If you should remember anything, it’s that eyepatches should never touch the waterline.
Incorrectly placed eyepatches will also cause the lashes at the inner corners of the lash line to lift, meaning your placement won’t be accurate, and the lashes will look messy.
Lash artist pro tip: Place the eyepatch at the inner corners first and gently press down along the rest of the eye line. Working from the inner corner will allow you more control over the patch’s placement.
3. Always use a map
A very important top tip for applying eyelash extensions for beginners is always to use a map! If you don’t, you may find yourself lost very quickly. Mapping allows lash artists to plan where each individual lash extension will be placed and is a helpful way to work out how you’ll achieve the required symmetry before you get to work.
Mapping is essential when working with layers. You’ll use your map to decide which length of the extension will be placed on each layer of the natural lashes, so even if you’re not at the stage where you’ve started working with layers yet, it’s great to practice your mapping skills now.
Lash artist pro tip: Ask your client to keep their eyes open for a moment so that you can mark the centre of the eye accurately. This is the best way to determine where the centre of the eye truly is, as when eyes are shut, you can’t see the iris.
4. Use just the right amount of adhesive
Making sure you use the right amount of adhesive is a delicate dance. Use too little, and the lash extensions won’t last long, use too much, and the lash extension will become too heavy for the natural lash and shed quicker than it should.
Don’t swipe the lash extension straight into the glue. Try a scooping motion instead. If you can see a little bead of adhesive on the extension, you’re probably on the right track.
Lash artist pro tip: Removing the lash too quickly from the adhesive will cause too much adhesive to attach to the lash. Try removing the lash slowly, with your scooping motion and scoop lower to collect less glue.
5. Don’t rush the pre-treatment stage
Sometimes you may be tempted to, but it’s important that you never skip your pre-treatment process – even for infill appointments. It can be the difference between your client having a good or bad experience with you. Ask your clients beforehand to come to the appointment without makeup.
Regardless of whether they comply with this or not, you’ll still need to clean their lashes and eye area with lash shampoo or protein wipes. Make sure that all makeup, dust and grime is removed completely, so you’re starting with a nice, clear base. You can use microfiber brushes or an applicator for lip gloss to really get to the roots. Then you can apply your cleanser and primer to the lashes.
Lash artist pro tip: If your client isn’t comfortable going makeup-free, ask her to at least avoid waterproof mascara on the day of her appointment, which is incredibly difficult to remove.
6. Get those lashes pointing in the right direction
Getting lash direction right takes a lot of practice, which is why it leads to some of the most common mistakes. Starting with the base direction, you need to make sure the inner and outer corner lashes fan outwards rather than straight ahead. You can do this by following a ‘sunrise’ pattern, which mimics how beams would shine out from the sun.
Secondly, you’ll need to keep an eye on the direction your lash tips are pointing in; if you don’t, the final look will be messy. The tips should look neat and point in the direction that the style you’re creating requires.
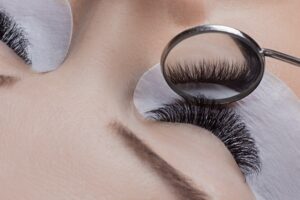
Lash artist pro tip: Make sure you have a small mirror to hand. It’s a great tool to use for placing under the lashes to check the direction of the lashes, whilst your client’s eyes are closed.
7. Avoid stickies!
Stickies are a term for eyelashes that have stuck together during the treatment. Beginners will likely find that they do find stickies on their clients, but with practice, this won’t always be the case. Stickies mostly happen due to individual lashes not being isolated properly and the next extension being applied when the previous extension’s adhesive hasn’t yet dried. Don’t panic if you notice a stickie! Simply remove the adhesive, clean the lash and reapply a new extension.
Lash artist pro tip: Always put 10 minutes aside at the end of every appointment to check your work. Thoroughly look through each of the client’s lashes with tweezers, including between layers, to check for stickies.
8. The ideal lash style will be different for every client
Clients will always think they know the style they want (usually cat-eye), but in reality, only the lash artist knows which style will truly suit the client best. It’s important that you consider bone structure, eye shape, and direction in which the client’s lashes naturally grow. The majority of looks will require you to mix at least two different curl types to create a natural, blended look.
Lash artist pro tip: Thick extensions and fans will damage the natural lash. Only apply these to clients for special occasions and ask the client to have them removed as soon as possible.
9. Have a consultation with every client and provide them with a client card
Lash artist pro tip: Having a conversation with your client before their appointment is essential to make sure their expectations are managed. Make it clear that, if they want to make any changes to their lashes, you may need to update the price. Everyone should get a client card, and these need to be updated once a year.
10. Don’t place the extension too close to the eyelid
There is a very thin line between attaching the lash extension too close to the client’s eyelid and attaching it too far away. Unfortunately, this kind of intuition only comes with lots of practice. Attach the extension too close to the eyelid, and you’ll cause pain and discomfort for your clients, as the adhesive can irritate the skin, and the extension can rub against the eyelid. If you don’t attach the extension close enough to the eyelid, you risk the lash growing too quickly and messing up the look, or it will become too heavy for the natural lash and cause damage.
Lash artist pro tip: The ideal distance to place the extension is 0.5-1mm distance from the eyelid. Remember, it is always better to place the extension further away, than too close.
We hope our eyelash extensions tips for beginners will help to alleviate any fears you might have about learning how, as well as ensure that your first experience is a successful one. These simple steps can make all the difference in making sure these treatments last and look great!
You may also want to check out these related articles:
The ultimate checklist: safety measures for lash application services >>>
